Today sinus “lifting” has become a very simple procedure.
What in our clinic we call “mini” sinus lift, that in our slang means trans-crestal sinus floor elevation, has become today a really predictable technique and allow us to avoid in most cases what we call the “big” sinus lift (that is the lateral sinus floor elevation).
Obviously the “mini” sinus lift is much less invasive and much simpler than its older bigger brother.
Thake a look at this case

You can see the whole temporal sequence with a one year follow-up from the implant placement.
You can see the really beautiful recorticalization of the sinus floor after the trans alveolar (mini) graft.
And trust me, this technique today can be used also in really extreme cases allowing immediate implant placement also when the pristine available bone is less than 1mm.
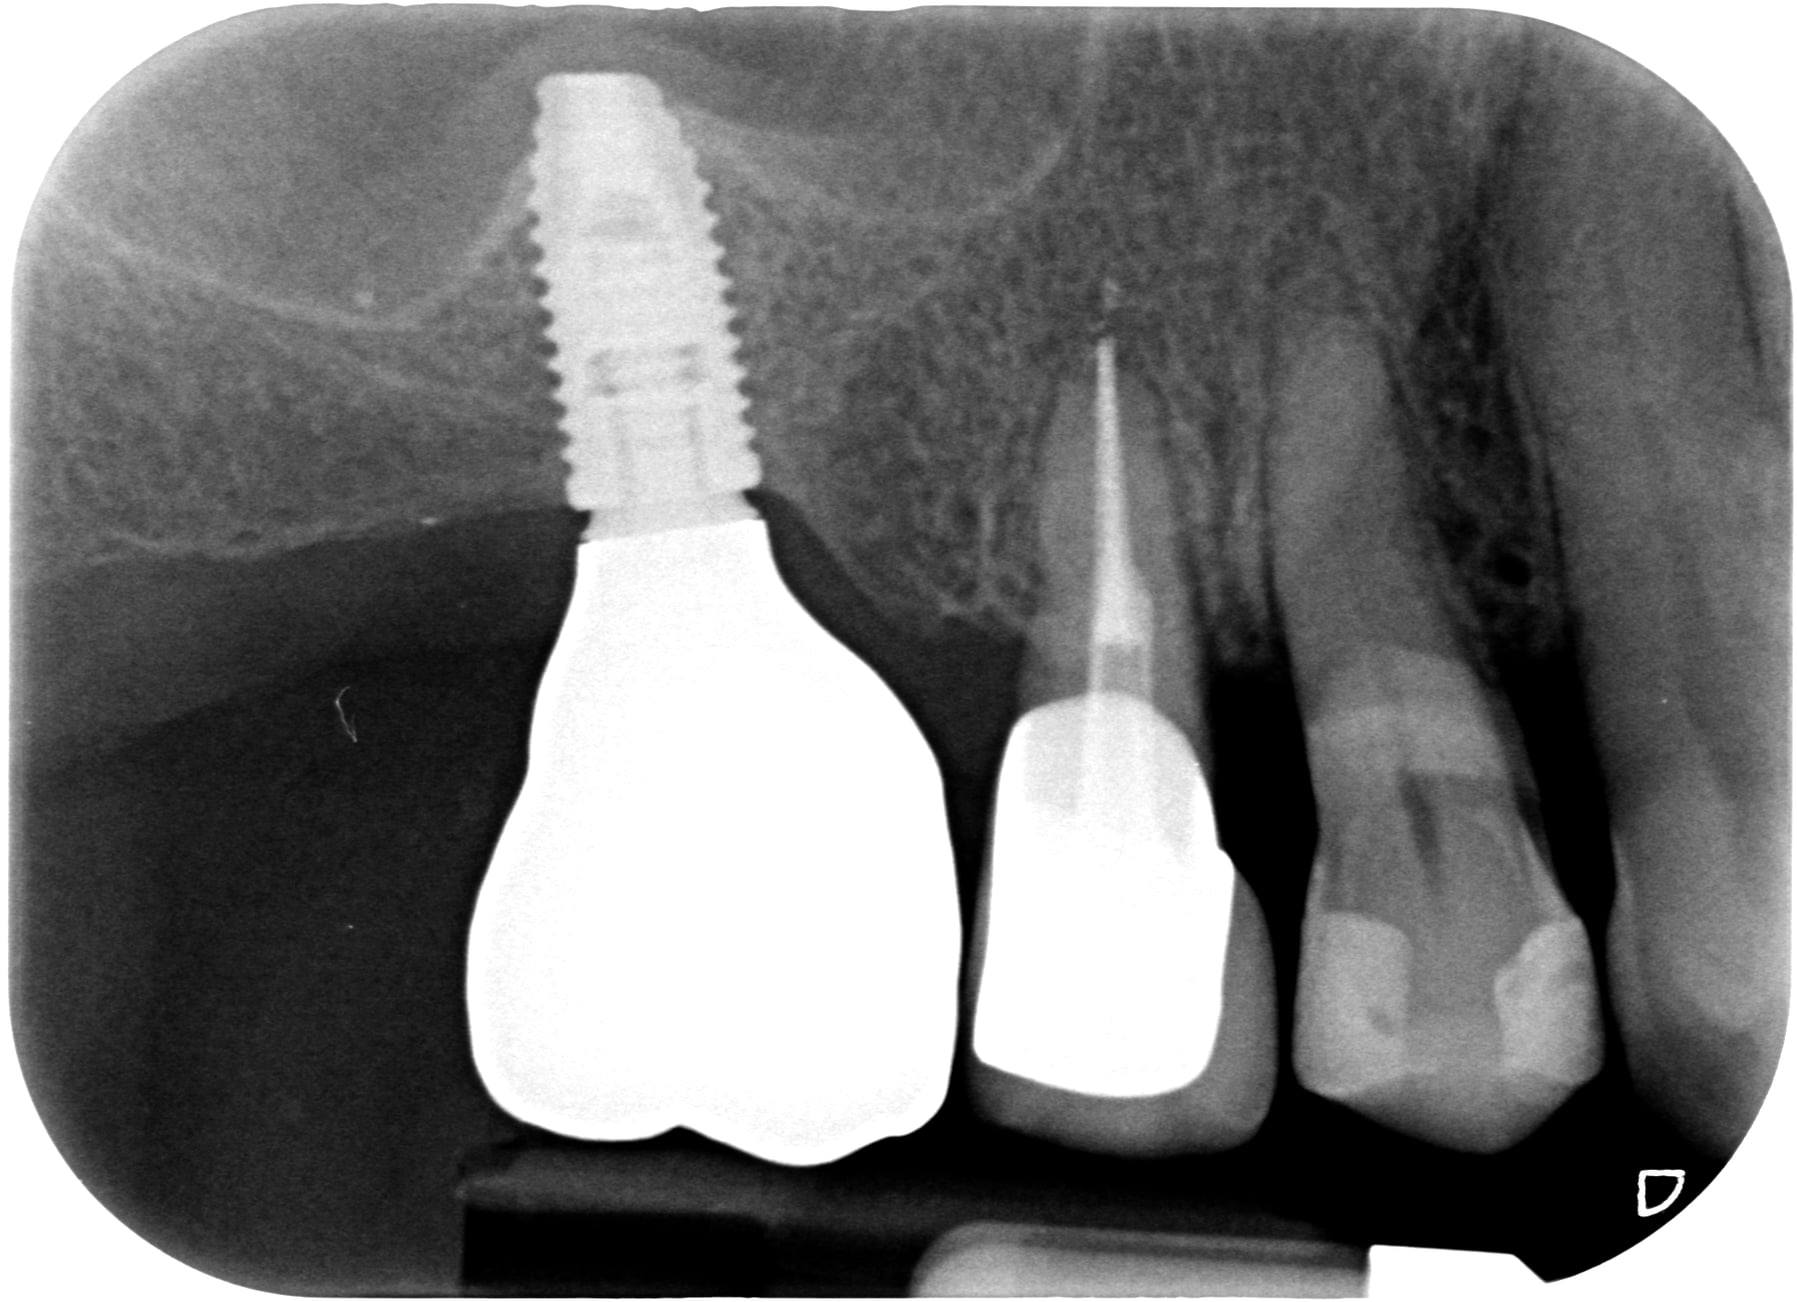
Look at this case:
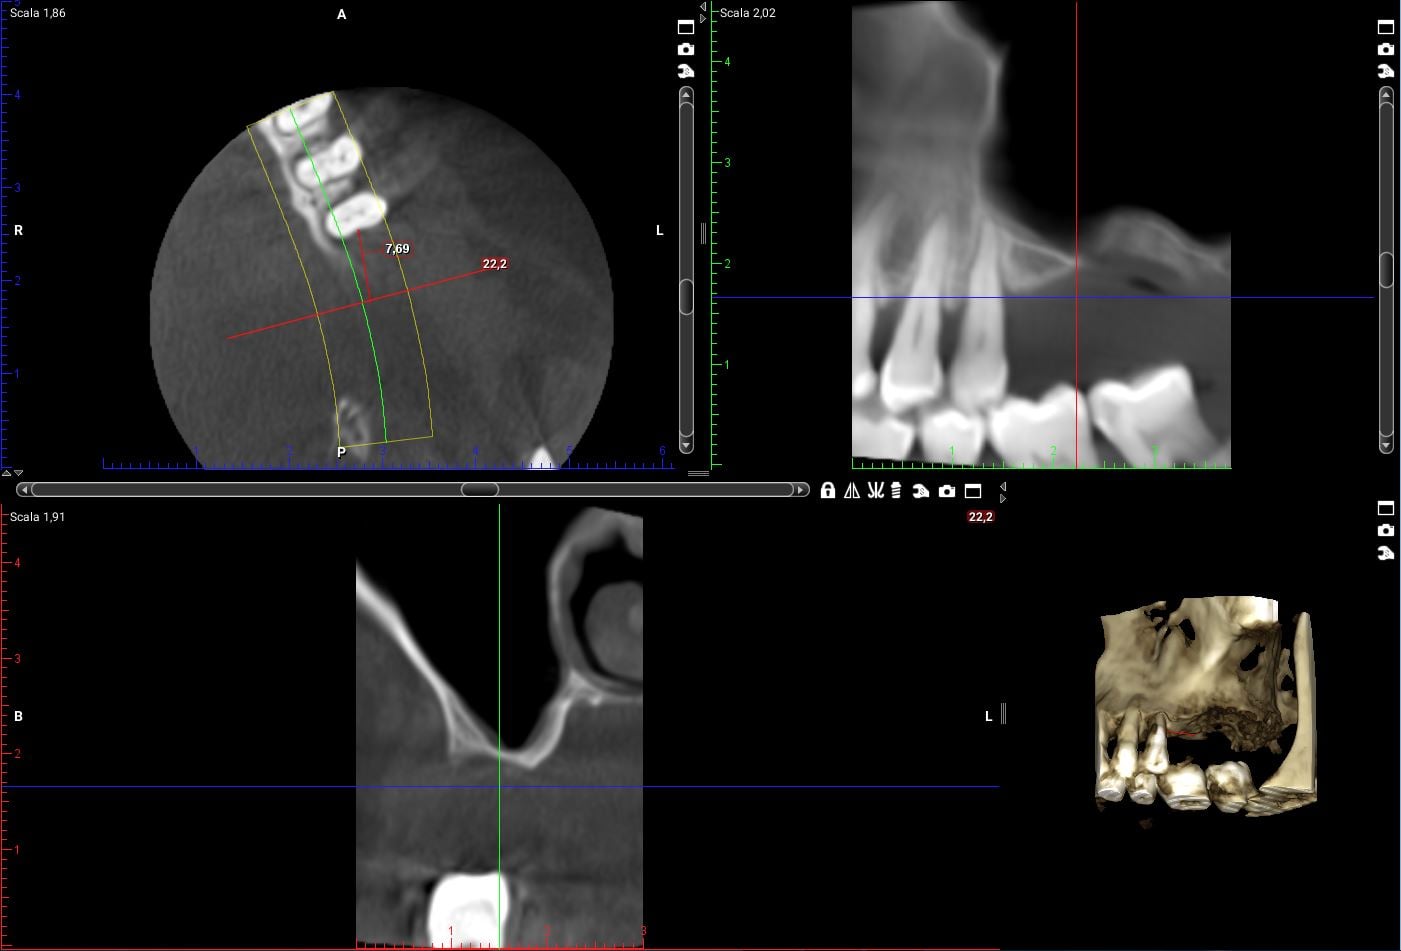
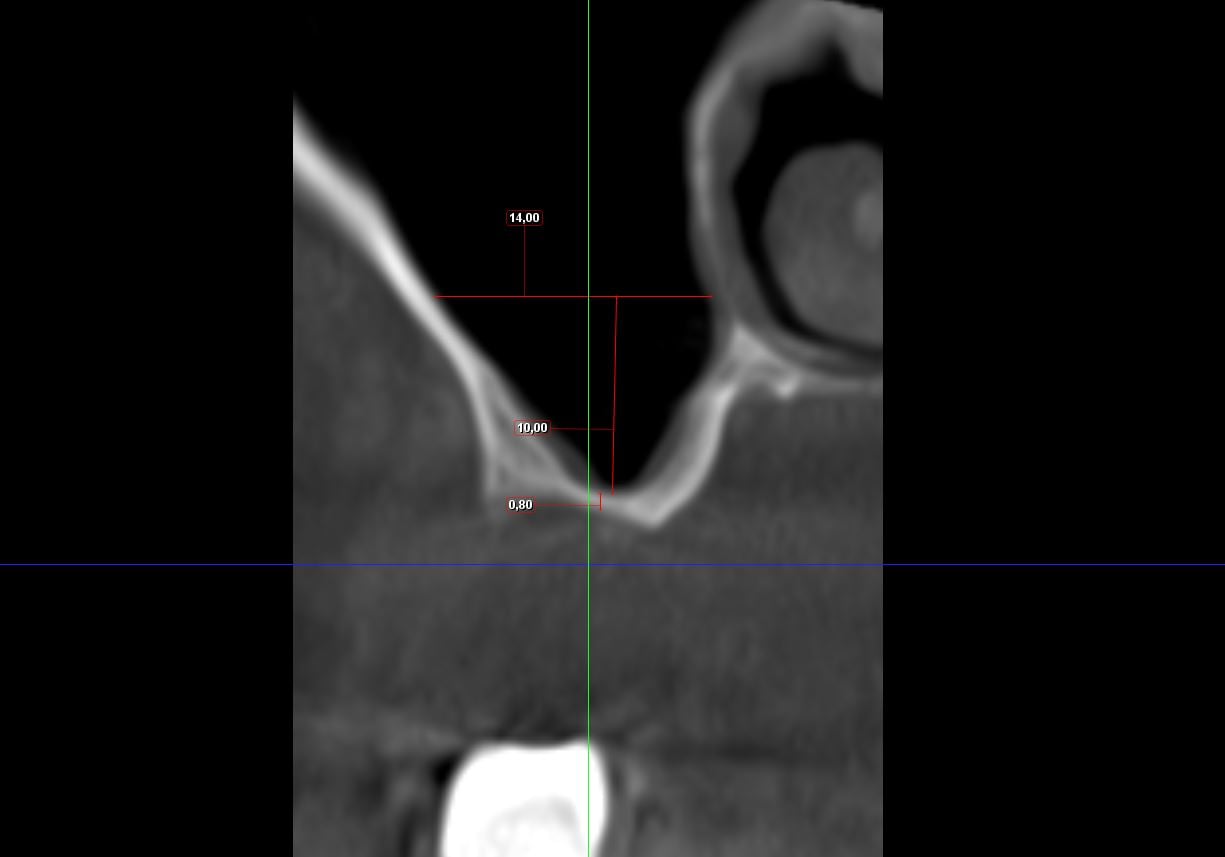
The bone available for the implant in the first molar is less than 1mm but I succeeded in performing a trans-crestal sinus floor augmentation placing the implants at the same time.
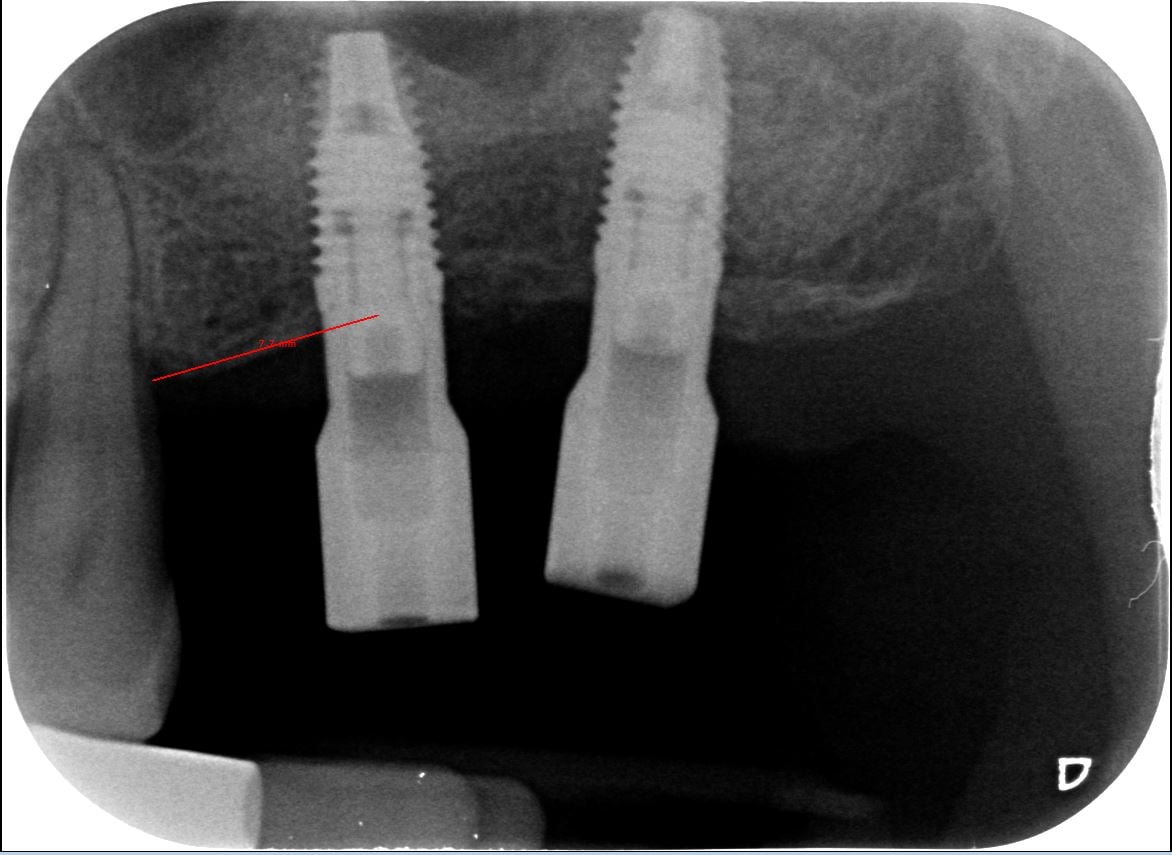
Here it is the result at the impression time:
Being this a blind technique, difficult cases like the previous one require a lot of experience; but once you have learned, it really becomes a piece of cake.
There are thousands of “SUPER-IPER-MEGA” surgical kits for the crestal sinus lift that are the fortune of sellers and fill-up the trays of the dentists that will never use them because are to complex and time consuming.
The technique I use is really cheap
and simple instead… you need only an osteotome and an amalgam carrier.
Here it is the steps:
- Measure the available bone
- Drill 0,5 mm shorter than the available bone with a drill that must be larger than the osteotome.
To place a 4,3 implant I use an osteotome with a 3mm tip so you can use a 3.2 or 3.4 drill, depending on the bone density
- Breaking through the sinus floor with a manual osteotome and a surgical hammer. Stop immediately when you feel the fracture.
- Push the biomaterial underneath the membrane little by little. If you have to do a little augmentation you cans also break the floor without placing any bone graft
- Screw a cylindric fixture with a tapered tip
- Above 35N put the healing abutment, under 35N put the cover screw
- Suture
Now you can see the integral video of this super technique.
See you (and make a lot of surgery!!)
Excellent presentation! Can u please tell me, what kind of implant system are u using in this video? Is it NobelParallel from Nobel Biocare? Thanks
Yes it is.
Thank you for sharing your skillful work! It was a real pleasure to watch. I would be grateful for few more tips:
1) Membrane perforation = immediate ending of the procedure? If you stop, then what do you do with the bonegraft that is already in the place?
2) What is the RPM setting when you are drilling?
3) Would you consider PRF as an addition to the graft material ( PRF as filler and as amortization for sinus membrane) ?
Best wishes,
Michal
Hi Michal,
1) Usually perforations happen in the beginning of the procedure. In this case you must shift to a lateral approach procedure and menage the little perforation as usual in sinus lift elevation
2) The RPM setting is 2000 but I don’t use it 100%. Is like the car, you can go all the way to 270 Km/h but you hardly ever do.
3) I’ve never used PRF. It’s not necessary so it’s a waste of time.
Regards